Wednesday, April 29, 2009

Cereal Number

Our pantry looks eerily like the cereal aisle at Wal-Mart. There are only four people in my family, yet somehow we've managed to accumulate no less than seven boxes of cereal in the pantry: Kix, Honey Nut Cheerios, Raisin Bran, Frosted Mini Wheats, All Bran, generic bran flakes, and some weird kind of granola made with hemp (um, yeah). That's in addition to the hot cereals: oatmeal, grits, and so on.

I find this intimidating.

And thus this morning I found myself standing in a cereal-haze for who knows how long, staring blankly into the open pantry and trying to decide what to eat for breakfast.

Thankfully, my college days (which included a LOT of cereal) taught me a life skill crucial for coping with this kind of quandry: when in doubt, choose 'em all. (You'd be surprised how many kinds of cereal you can dump in one bowl and still have it taste good.)

Unfortunately, it wasn't until after all this that I realized we’re out of milk.

The simplest solution to this probably would have been "make toast." But that's admittedly sort of boring, and, on consideration, I realized that the gray, nasty weather made it a perfect muffin-making/coffee-drinking morning. At the same time, by this point, I was sort of hung up on the idea of cereal. So I compromised and improvised: cereal muffins! Why not?

My tried-and-true Taste of Home Baking Book has a decent recipe for Three-Grain Muffins. I added some stuff, took out some stuff, made healthy modifications as per the usual, and came up with this, which I really liked. They’re hearty, full of fiber, not overly sweet, and great with coffee.

Cereal-Aisle Multigrain Muffins
½ cup crushed Mini Wheats cereal
¼ cup crushed bran flakes
¼ cup crushed All Bran
¼ cup quick-cooking oats
¼ cup wheat germ
¼ cup white cornmeal
¾ cup low-fat buttermilk
¼ cup very hot water
¼ cup fat-free sour cream
¼ cup applesauce
1 egg
½ cup packed brown sugar (I actually used brown-sugar Splenda)
1 cup whole-wheat flour
½ teaspoon ground cinnamon
1¼ teaspoons baking soda
¼ teaspoon salt
(You could also add a mashed banana, raisins, nuts, and/or chopped apples or berries.)

1. Heat oven to 400°. Grease a 12-cup muffin tin; set aside.

2. In large bowl, stir together Mini Wheats, bran flakes, All Bran, oats, wheat germ, and cornmeal. Stir in buttermilk hot water, sour cream, and applesauce; let sit about 1 minute. Beat in egg (by hand). Stir in brown sugar.

3. In separate bowl, combine flour, cinnamon, baking soda, and salt. Add to wet mixture and stir just until moistened. (Batter will be lumpy.)

4. Spoon batter into prepared muffin cups, filling each about ¾ full. Bake 15–18 minutes or until toothpick comes out clean. Cool on wire rack 5 minutes.

Makes 1 dozen muffins


Ironically enough, that last picture is of what I found in the mailbox after the whole above-narrated episode: a cereal sample. Ha. Make that EIGHT boxes of cereal now in our pantry!

Monday, April 20, 2009

My Little Rescue Mission

Today, I would like to talk about a subject near and dear to my heart: pears.

Where do I even start? There are very few fruits that can lure me away from the-wonder-that-is-chocolate, or that I would ever, ever consider an acceptable replacement for “real” dessert (i.e., the kind that involves chocolate). Apples can’t do it. Bananas can’t either. Kiwis? Nope. Berries? Nah. Oranges or melon? No way. But pears…pears...well, okay, I guess they can't actually do it either. (I mean, we're talking about chocolate here.) But they come far, far closer than any other fruit I know of and definitely are at the top of my "favorite foods" list. Oh, magic pears.

Now, I was a little bit overzealous about a week ago and brought home a ginormous bag of assorted pears from Trader Joe’s—more than I possibly could eat, and I should have known it (and I’m the only pear-eater in the family). So what I wound up with was a huge bag of assorted pears ripe to the point of getting mushy.

Eating a bag full of pears in a sitting is not an option. Yikes. And throwing out pears is not an option, either. That’s almost as bad as throwing out chocolate. So, what to do?

Make pear bread!

This was one of those recipes that I sort of pieced together (I think I originally got the recipe off "Bake of Break") and made some changes to--mostly making it healthier. I think I’ll call it “Save the Pears, Save Some Calories” pear bread. Ha. (Sort of “Heroes”-esque, isn’t it? “Save the cheerleader, save the world…”)


"Save the Pears, Save Some Calories" Bread
2 tablespoons white sugar
1 teaspoon ground cinnamon
1 1/2 cups whole-wheat flour
1/2 teaspoon baking soda
1/8 teaspoon baking powder
1/2 teaspoon salt
2 teaspoons ground cinnamon
1/4 teaspoon ground ginger
generous pinch nutmeg
1/4 cup applesauce
2 tablespoons fat-free sour cream
1/2 cup brown sugar (I used brown-sugar Splenda blend)
1/2 cup white sugar (I used Splenda)
1 egg plus 1 egg white
1 teaspoon pure vanilla extract
1 1/2 cups chopped ripe pears

Preheat oven to 350°. Lightly coat a 9-inch loaf pan with cooking spray. In small bowl, combine 2 tablespoons sugar and 1 teaspoon cinnamon. Sprinkle over bottom and sides of pan and tap out excess. Set aside.

In large bowl, combine flour, baking soda, baking powder, salt, and spices. In separate bowl, combine applesauce, sour cream, egg and egg white, sugars/Splenda, and vanilla. (I like to use a wooden spoon, not an electric mixer.) Stir in the pears. Add pear mixture to flour mixture, and stir just until combined.

Pour batter into prepared pan. Bake about 30 minutes, or until top is beginning to brown and toothpick inserted in center comes out clean.

Cool in pan for 10 minutes before removing to wire rack to cool completely.

(NOTE: This is best the day after baking it. Just nuke a slice in the microwave for a few seconds, and mmm...)

Let 'Em Eat Cake

White chocolate raspberry cake, that is. (I think they’ll like it.)

This was my latest “for hire” cake—a birthday cake for a friend-of-a-friend’s 50th. They were planning some sort of elegant dinner party and wanted a pretty cake as a centerpiece of sorts. I had freedom to play with this one quite a bit. They requested white chocolate and raspberry as the flavors, but, for decorating, really the only parameter I was given was to make it pretty and sort of “shabby chic” looking, and to include a fondant “poof” on top.

This cake involved several things that were new to me.

New thing #1: making my own royal icing. This was really easy, actually; I just used the recipe in one of my Wilton books.

New thing #2: making royal frosting decorations the day before making the cake. This was fun. I had decided to go with dusty rose, moss green, and bright white as my colors, so I dyed the frosting a rose color and then made a ton of drop flowers on wax paper and left them out to dry.

New thing #3: making half-roses. Something I’m still learning is the art of rose making. (I’m sooo bad at it!) But half-roses turned out to be not so hard. I piped a bunch of them onto the wax paper with the drop flowers and let them everything dry overnight.


New thing #4: dying fondant. Now THIS was entertaining. Working color into fondant takes some serious elbow grease—a lot of kneading, kneading, kneading. And it took me a while to get the color just right, the same as the frosting flowers/roses. But it came together nicely.

New thing #5: the fondant “poof.” This turned out to be not too difficult either, though I got the ribbon loops too large and ended up having to shorten then the next day (which made the fondant crack a little). Live and learn.


The rest was pretty much normal: frost it, stack it, decorate it.


End result: a white chocolate cake with white chocolate and raspberry fillings and white chocolate buttercream frosting. YUM. And I liked the look and the colors. All in all, I was pleased.


Sunday, April 19, 2009

Super Saturday

What do you get when you take 25 women (always an interesting start), get them up before 8 a.m. on a Saturday (can anyone say “sleep deprivation”?), and seclude them in a fluorescently lit church basement for nearly six hours? Besides some major coffee overconsumption, apparently you can actually wind up with a pretty rad women’s conference. We did, anyway.

This past Saturday was our “Titus 2 Super Saturday” at the church, and it was more than worth forfeiting some sleep for. Our guest speaker was Debbie Cotchey from Plainfield Bible Church, and we also had three “homegrown” speakers, one of whom was my mom. (Great job, Mom! Thanks for not using too many embarrassing anecdotes involving me.)

I was excited to be asked to cater lunch for the event. (Um, twist my arm? Ha.) So I spent all day Friday shopping, prepping, cooking and baking, and otherwise getting ready. The menu:

- “Gourmet” mini sandwiches (two kinds: turkey/cranberry/cream cheese on Hawaiian bread and ham/turkey/salami on mini bagels). I didn’t get any pictures of these, though I wish I had. Cut in half and toothpicked, they were really pretty.
- Spring pasta salad with homemade vinaigrette. I loved the dressing for this (shallots, garlic, and thyme=crazy fragrant), and the fun pasta I used.
- Hot baked spinach dip with Wheat Thins. This dip is a favorite of mine. (And, yeah, I worked hard on those Wheat Thins. Ha.)
- Fresh fruit (strawberries, pineapple, and green and red grapes)
- Cranberry white chocolate cookies
- Mini raspberry cream brownies
- Almond cheesecake bites

Below are a few random pictures of the process (not too many; unfortunately, I kept forgetting to get pictures). I didn’t get any the day of the event, since we were busy rushing around getting it all prepared and set out. Oh, well. This is typical for me, picture-wise: all food, no people.

Hauling in all those bags would make a pack mule proud.

I’m in love with this kind of pasta (radiatore). Pretty, isn’t it?

Homemade vinaigrette dressing.

Tomato and basil. I’ve decided that the answer to “I wonder who first thought up that combination?” is “Whoever first smelled the two together.” Mm.


Lots of colorful salad ingredients.

Stuffing everything into the fridge was a work of engineering. It did fit, though.

The “conjoined twins.” Yes, I took a picture of a strawberry…um, of strawberries…is it one or two? Good grief. Look at the thing!

Mini chocolate chips getting sucked into the brownie-batter vortex. Lucky them.

Cookies cooling on my new favorite kitchen item: the stackable cooling racks! (They also collapse for storage. Brilliance.)

Cheesecake bites. I had SO much fun with them. Loved how they turned out.

And they were yummy, too.

Anyway, all in all, it was a great Saturday, and I'm definitely looking forward to next year!

Friday, April 3, 2009

Double Feature

I absolutely love rainy days--the ominous clouds, the thunder, the earthy/wet smell...everything. I also love being "trapped" indoors during rainy days. It doesn't get much better than opening the windows, listening to the rain, and spending the afternoon puttering around the kitchen.

Yesterday was that kind of day (for part of it, anyway; the rain didn't last that long). And it was a double-feature baking day, meaning I created a disaster in the kitchen, spent a lot of time cleaning it all up (dishes, dishes, dishes), and then turned right around and decided to do it all over again. This isn't uncommon, for two main reasons: (1) I just like baking that much, and (2) while I make full-fat, full-sugar, don't-want-to-even-think-how-many-calories-are-in-it desserts for other people (mostly Adam), I also like to also have healthier options around. (Yep, my goal is to make everyone else eat the junk so that they all get fatter and I therefore look thinner without even trying. Bwahaha!)

So, Take 1: S'mores Bars. I found this recipe the other day and thought, "S'mores without a bonfire? Sure, I'm game." The concept is great, made me feel summery, and sounded wonderfully simple: a couple of jumbo-sized chocolate bars spread with marshmallow creme and sandwiched between two layers of sugar cookie made with graham-cracker crumbs. Supposedly it would bake up into gooey, s'mores-y bars. Supposedly...but I didn't anticipate a few things with this.

First, who knew that assembling these things would be such a pain in the butt? Marshmallow creme, I've decided, is of the devil. Seriously. It took me probably 10 minutes just to get the stuff spread over the top of a little 8-inch square pan. And it didn't help that instead of chocolate bars, which I didn't have, I had to try spreading the stuff over a messy layer of chocolate chunks and shavings. (As you'd imagine, the creme just sort of picks up the chunks and stays stuck to the spatula...or my fingers...or anything other than what it's supposed to be stuck to. Grr.) Then there's the issue of getting the second cookie layer over the creme. I decided to skip a marshmallow nightmare recap and spread the dough out on wax paper and then invert it over the top of the creme; it was a good move, I think, but it took a while.

Anyway, here was the result:

The long and short of this is that a seemingly easy, amazingly good-looking recipe turned out to be not-so-easy and not so amazingly good. Don't get me wrong; they were good. Just not "Wow!" good. Not worth the marshmallow battle good. More like "Hm, these are nice" good. I think I'll have to tinker with this recipe in the future and see if I can't get some more "wow" out of it.

Take 2 (a healthier option): Orange Streusel Loaf. Now this I love. I found the recipe on "Just Baking" and figured it would be a good one to make a healthier version of. It's not really a spring or summer recipe, I think, despite the orange flavor.

This is an orange quick bread that uses an entire orange, peel and all, that's been ground up in the food processor. Fun, huh? My healthy swaps: egg whites instead of eggs, applesauce instead of oil, half the sugar replaced with Splenda, and nonfat plain yogurt instead of milk (this also adds some nice moisture). I also added some spices, cinnamon and cloves, to both the bread and the streusel topping. The combination of orange, chocolate, and spices is sooo good.

I mixed up a streusel topping (using some reduced-calorie margarine) and used half of it inside the bread, as a thin ribbon running through it. The top has an ounce of dark chocolate melted and marbled through it, covered by the other half of the streusel.Can I just say that this smelled AMAZING while it was baking? It rose beautifully and was moist, flavorful, and pretty. Definitely a keeper. (And not all that bad for you, with the substitutes.)


Anyway, I'm thinking my next post may be good old fashioned chocolate chip cookies. My friend and former roommate Jen is coming in for a visit from California this weekend, and our reunions will, without fail, include Pinky and the Brain episodes and way too many homemade chocolate chip cookies (or the dough, at least).

Thursday, April 2, 2009

Better Together

Jack Johnson got it right; a lot of things are better in pairs. Shoes, for instance. Or contact lenses. Or geese, apparently. (This is yet another odd Indiana phenomenon I've discovered: goose couples all over the place come spring. I have yet to see a lone goose. It's sort of intriguingly endearing.)

Anyway, I find that this concept carries over into the baking world, too. Case in point: two cookies are, hands down, better than one. Who wouldn't agree with that? And when they're stuck together with a heaping, gooey glop of buttercream frosting...we're reaching superlative status for sure.

This whole concept is sort of nostalgic for me. When I was little, my mom used to take us ("us" being my brother and me) to the mall on occasion to get these things called "Double Doozies." Very aptly named. Basically, they were two gigantic, soft, chocolate chip cookies with a half-inch thick layer of bakery frosting in between. I don't even want to know how many calories are in one of those things, but holy cow, it's worth it.

I've recently been on a recreate-the-Double-Doozie kick. Chocolate chip with bakery frosting was a hit, according to my brother and my dad's coworkers (my frequent recipe guinea pigs), and peanut butter turned out well, too. Last night, I bought a package of Andes mints on a whim and decided to see what those would be like in a sandwich cookie form.

The result? Mmm...

I started with a Chocolate "Crispies" cookie recipe from my Taste of Home cookbook and modified it quite a bit. I wanted chocolate cookies that would be chocolaty but not overpoweringly rich, and soft but able to hold up when sandwiched. And I didn't want them crispy...or with nuts...okay, so I changed the recipe a lot. Anyway, here's how it went:

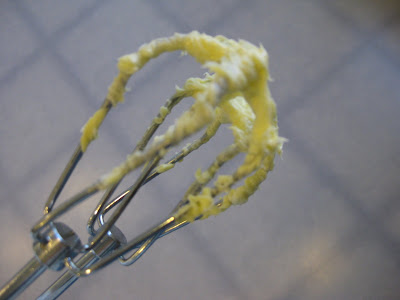
These started out like any cookie, with the butter and sugar and eggs. Then my favorite part: some melted unsweetened baking chocolate. (I love how shiny it looks in pictures!) Usually chocolate cookie recipes call for cocoa powder, so this whole melted-chocolate thing was part of the appeal of this particular recipe.


After the dry ingredients were added, it was time for the Andes mints. This was the fun part. Dump 'em on the counter...strip 'em...chop 'em...stir 'em in.


After this, I dumped the dough in a Ziploc bag and refrigerated it. (Usually I like to chill cookie dough overnight, but I was in a hurry on these and left them in the fridge for only half an hour.)


After the dough chilled, it just needed to be formed into pretty little balls, lined up on parchment-lined baking sheets, and baked.
After that I mixed up some basic bakery buttercream (the Crisco-y stuff that I don't really like but my family loves) and added some peppermint extract and green food coloring. A heaping tablespoon of frosting between two cookies, and voila!


I think Adam approved. (Mesmerizing, no?)